How to install modern hardware on a custom wood door


Guys! We have the most exciting basement door update for you. We haven’t really done anything else in the basement aside from our One Room Challenge hallway reveal, which included our basement stairs, however today we are upgrading our DIY custom sliding door. Before we get started make sure to follow along on Instagram + Pinterest!
When we got back from our most recent beach vacation, our new door hardware had arrived, but then a storm hit and our one hundred year tree fell on our fence and completely crushed our gate. We spent all last week removing everything, including cutting down the tree, and then rebuilding. You can check out ALL of the behind the scenes of Scot cutting down the tree himself on Instagram. They’re saved to our gate+fence highlight!
Today we finally had a spare moment to install the new door hardware, and to say I’m in love is the biggest understatement of the year. We researched and researched to find the perfect fit. We didn’t want anything too farmhouse, something a little darker to add contract, and had multiple options for two sided door hardware. This door hardware checked all of those off that search list, and now we have a custom sliding door that we can actually open and close, offering some peace and quiet in our basement office while we’re working.
Speaking of basement office, did you guys know that we built our own custom DIY desk for our space? In case you missed that post click on the button below! You can also find all of our DIY PROJECTS HERE on our Pinterest account!
Back to our door hardware installation! The entire install took us roughly 4 minutes to install. It was so easy and straight to the point. I took a few photographs on the install to show you just how easy it was. Ready?
HOW TO INSTALL MODERN HARDWARE ON A CUSTOM WOOD SLIDING DOOR
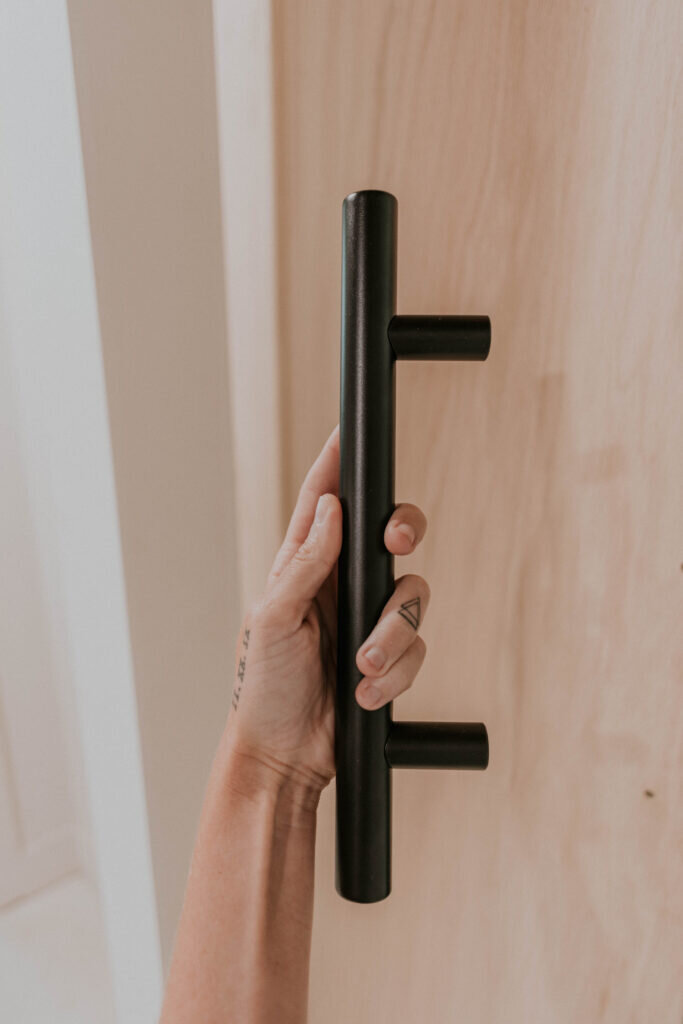
First what you’ll want to do is grab your door hardware and hold it up to your door to determine where you’d like the placement. Once you determine placement, grab your tape measure to ensure that the handle it even on both top and bottom.


Next you’ll grab your drill and the correct sized drill bit and drill where you marked your hole placements with a pencil. Make sure you drill level and not at an angle, as this will hinder the hardware install.

Since this is a two sided door hardware set, we marked the holes on the outside of the door, however we’re actually using that flat part of the hardware on the inside of the door, and using the bulkier handle on the outside (basement hallway) if that makes sense!
Using the bolts provided, slowly drill them into the flat piece of your new door handle hardware.

Finally, grab your handle hardware and install it on the opposite side of your flat piece. How GORGEOUS is this modern handle, though???

Tighten, tighten, tighten! Make sure when you get to the end of the bolt to slow down a little so you don’t experience any issues.

Make sure you check both sides while you’re installing the bolts to make sure everything is working properly.

Then take a step back and ohh and ahh over your new gorgeous door hardware!
I love the contrast of the black handle hardware against the beige walls and wood tones. It’s the perfect statement piece for this huge DIY custom sliding door!

Feel free to save this project for later by pinning the graphics below to your Pinterest boards.